What is Slow Stitching?
We had an ice storm in the early part of January and while we were house bound by the weather I discovered “slow stitching.” I fell in love with the process and the meditative qualities of these small hand stitching projects and I thought you might also like them!
What is slow stitching?
Slow stitching is a world where time slows down, where imperfections are celebrated, and where creativity blossoms in the unhurried pace of needlework. It is a form of meditation…random stitching with no specific plan or agenda.

So, grab a needle, gather some embroidery thread and cotton fabric scraps. Then prepare to embark on a voyage of creativity, mindfulness, and the art of slow stitching where every stitch is a celebration of beauty, and a reminder to cherish the journey as much as the destination.
Collect Supplies

You will need:
Scissors
Embroidery needle
Embroidery Floss ( I used 5 and 8 weight pearl cotton)
Background fabric and cotton fabric scraps for collage
A comfortable place to stitch

Keep your slow stitching projects and all of your supplies in a basket for easy transport. This style of stitching is great for keeping your hands busy while watching your favorite shows in the evening, waiting for kids at school, or sitting by the fire with your morning coffee.
Make a Collage

I chose 5 inch linen squares for backgrounds but the options are limitless. You can make a long skinny background like a ribbon, or use a larger background if you want more time with one piece.
Arrange small pieces of cotton fabric in a collage on top of your background fabric.
Baste

Baste the pieces in place. You can remove the basting stitches later or leave them in as part of the composition.
Stitch
You can stitch the entire piece with a simple running stitch or add fancy embroidery stitches as you feel the piece “speak” to you. Free form is the goal…perfection is the enemy!


You can use a small embroidery hoop if that feels natural. I actually enjoyed holding the pieces in my hand and feeling the fabric in my fingers.
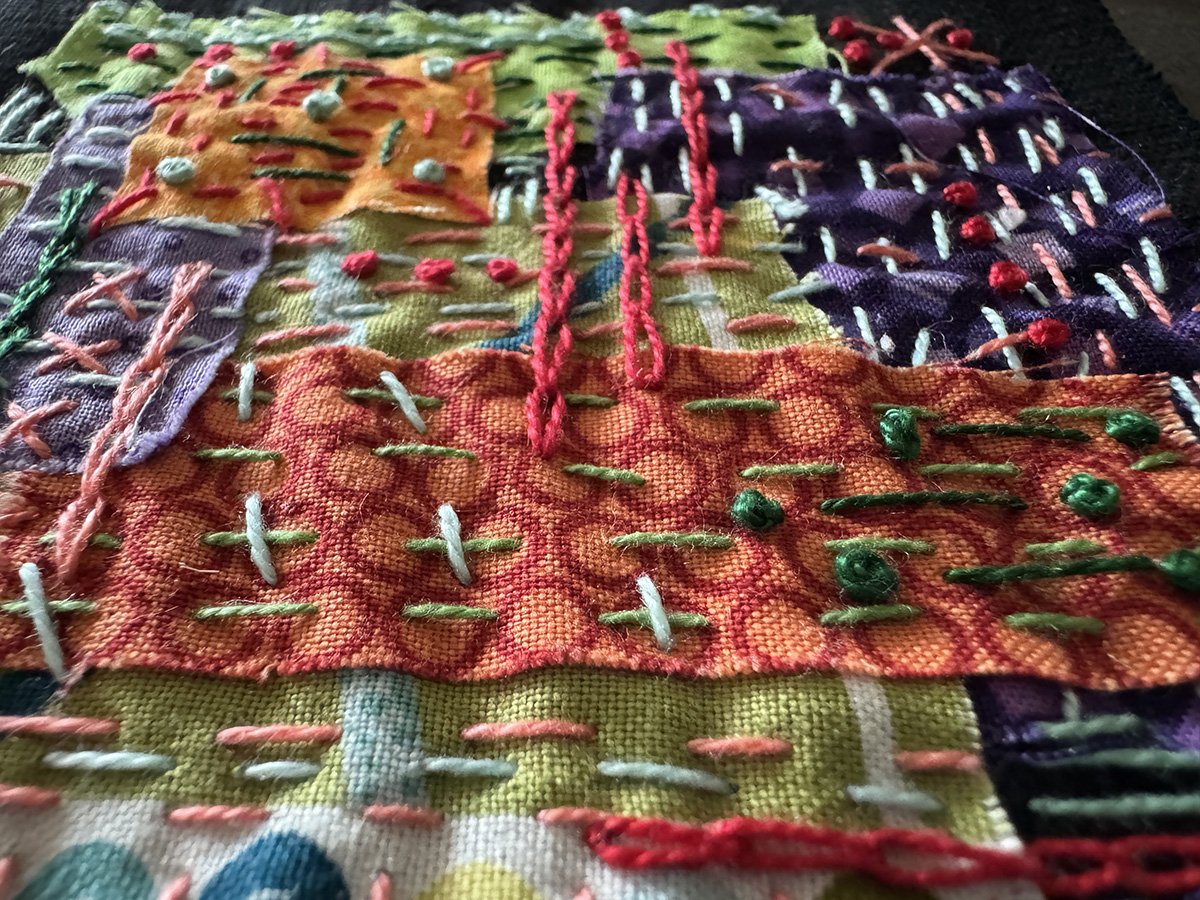
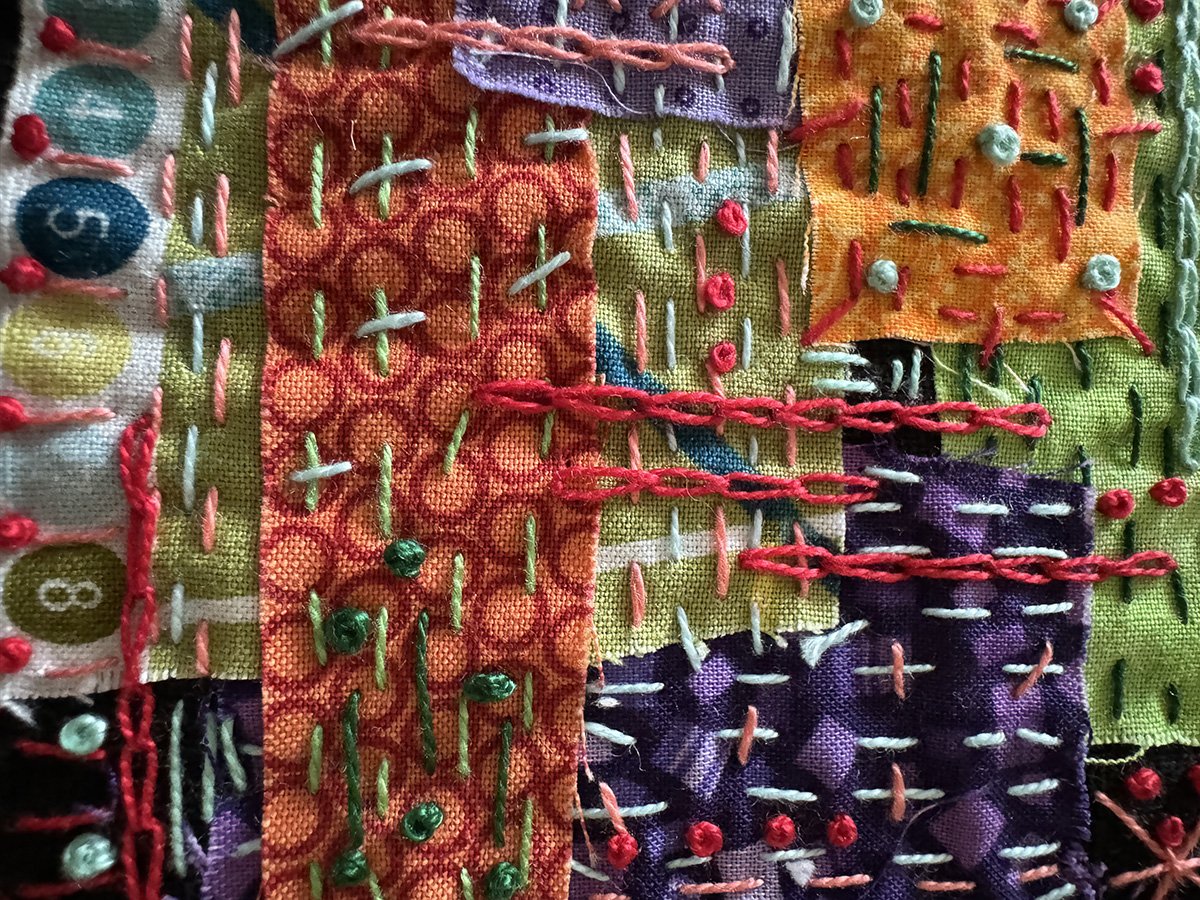
The goal is to simply stitch the collage any way you wish!

Here are some examples and a bit of inspiration. You can also add ribbons, buttons, lace…anything you like.
Projects for Slow Stitching
Although the goal for slow stitching is not a finished product, I wanted to make something to hold my slow stitching supplies.
I used two finished pieces to make a needle book. The pages hold scissors, needles, and threads.

How to Make a Slow Stitch Needle Book
There are lots of Youtube tutorials that show how to make a needle book.
This tutorial is very simple and easy to follow! After you have the basics you can customize your book as you wish.
This tutorial is a bit more advanced and I like how she makes the inside pockets.

General Instructions

1. Choose Your Felt and Fabric:
Select felt and fabric in colors that appeal to you. You can choose a single color or mix and match for a more vibrant look.
I used two slow stitching pieces for the exterior cover, three different purple cotton fabrics for the inside cover and pockets, and several bright colors of felt for the pages.

2. Cut Fabric and Felt:
Cut two rectangles of fabric: one for the exterior cover and one for the interior cover. The size of the rectangles is your preference. The cover pieces are slightly larger than the felt pages.
You can also cut small pieces of fabric for page embellishments.
3. Make the Cover:
Place the exterior and interior cover pieces together (right side together).
Stitch around the edges leaving an opening at the bottom .
Clip corners and turn right sides out. Press and stitch the opening closed.

4. Attach Inner Pages to Cover:
Center the edges of the inner pages with the edges of the outer cover.
Use pins to secure the inner pages in place.
Machine stitch down the center of the pages.

Front of Needle Book

5. Final Touches:
Optionally, you can add a closure such as a button and loop or a snap fastener to keep your needle book closed when not in use.
When your book is complete…you can continue to slow stitch on the inside by adding decorative stitches to each page as well as buttons and ribbons!
6. Personalize:
Add your initials, a small embroidered design, charms, buttons, or ribbons.
7. Fill Your Book with Needles and other supplies:

Insert your sewing needles neatly between the felt pages,

Designate a “thread page” for small pieces of floss that are to short to put back on your spool.

Place a pair of scissors in your book and secure them with a ribbon.

Back of Needle Book
Creating your own needle book is not only a practical sewing project but also a fun way to express your creativity and use your Slow Stitching pieces. So gather your materials, unleash your imagination, and enjoy the process!

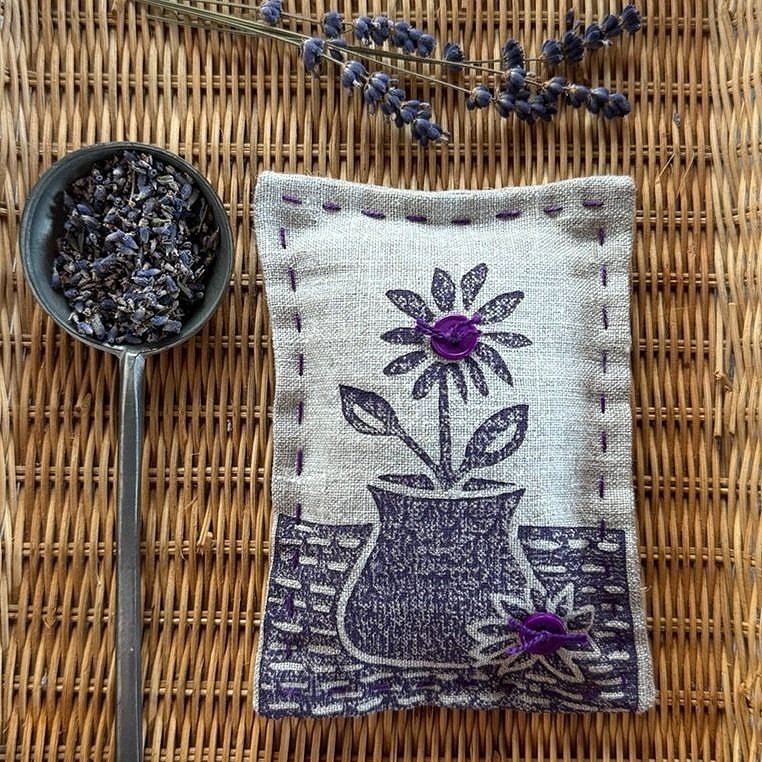


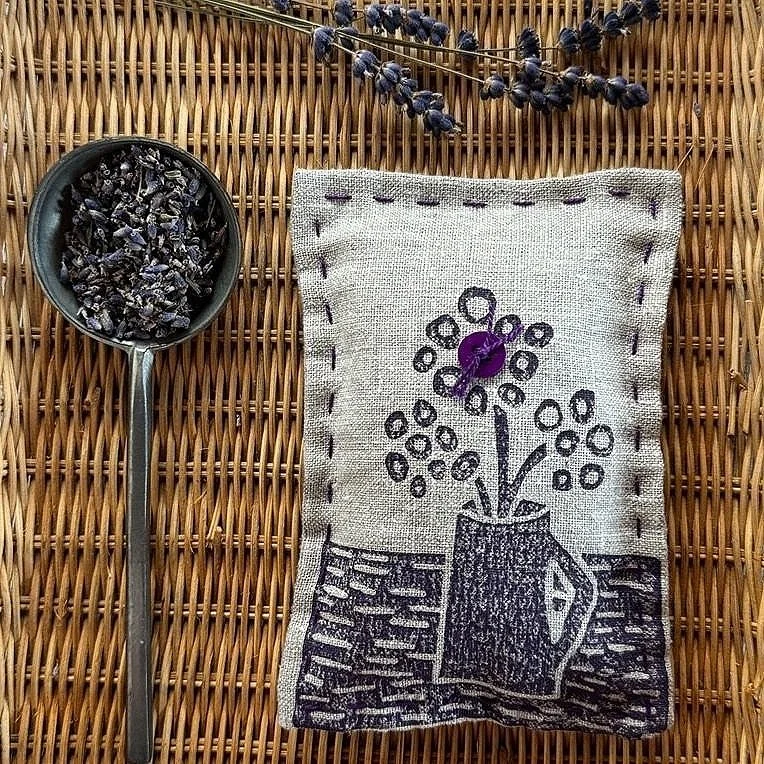


Lavender Sachets
$14.00